Installing websites
This tutorial assumes that you have already duplicated the website Notion template into your Notion. Do not continue if you have not duplicated the Notion template for the website you are installing. Installation will fail if you do. The link to the Notion template will be made available to you by the authors of the website.
Note that Dashboard and Notion Template are used interchangeably within MotionLink.
Before you install
Before you install the website component for your Notion template, make sure all of the following are true:
You are signed into your GitHub account. You can create a GitHub account here. GitHub is where your website source will sit. This is to make it easy for you or your developer to modify the source code shall you wish to customise the site further.
You are signed into your Netlify account. you can create a Netlify account here. Netlify is where your website will be hosted. You can change your website domain from Netlify after installation, shall you not be happy with the default domain.
And, of course, you are signed into your Notion account. You will use Notion to manage the content of your website.
Installing the website
Your duplicated Notion template will have a root page with a callout block that looks like the following:
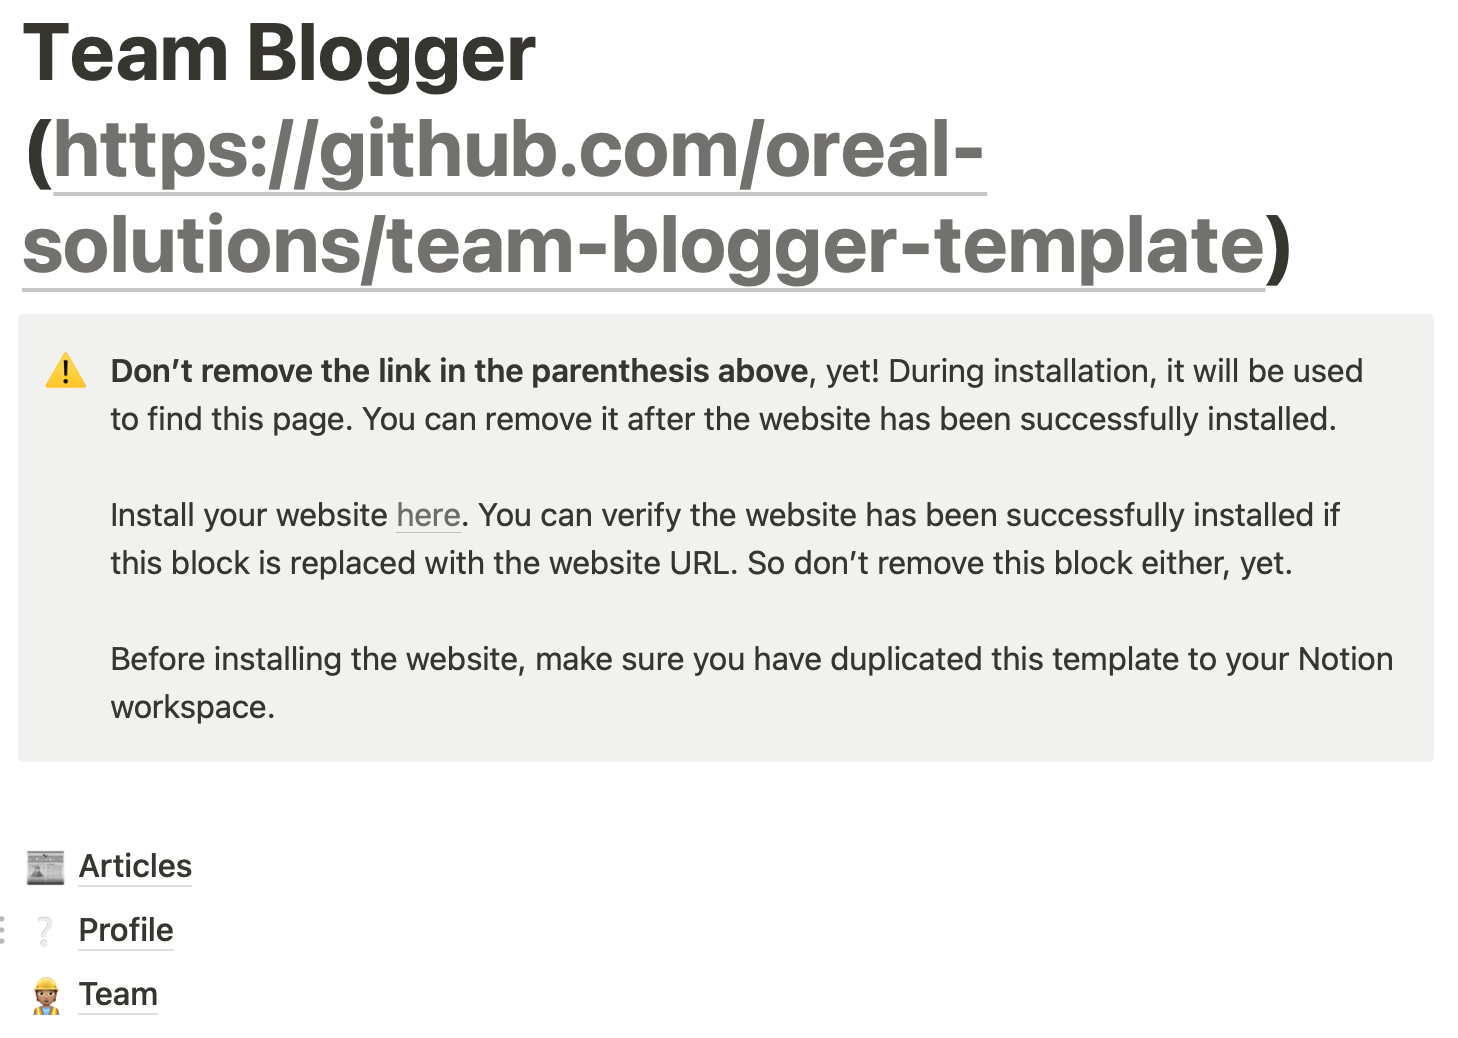
You can remove the Github link in the title after installation, not before. Follow the link in the callout block to install the website. This link is different for each template.
💡 Note that the callout block is the grey box with a warning emoji ⚠️
The link will take you to the MotionLink console where you will have to sign into your GitHub, Notion, and Netlify accounts. If you are not redirected back to MotionLink, come to your Notion and follow the link again.
MotionLink will ask you to confirm the installation. Confirm to begin the installation. If during installation you get an error that says “Give access from Notion.”, don’t panic, come back to Notion and give MotionLink access to the dashboard you just duplicated and follow the install link again.
Once installation completes, your site will be ready. The callout block back in Notion will have the URL to your website hosted on Netlify. You’ll now need to trigger the initial publish.
Initial Publish
Log into GitHub
Under your repositories tab, select the newly created repository. You can sort the repositories by the last update time and pick the first one.
Under Actions tab, you will see a UI that looks like this:
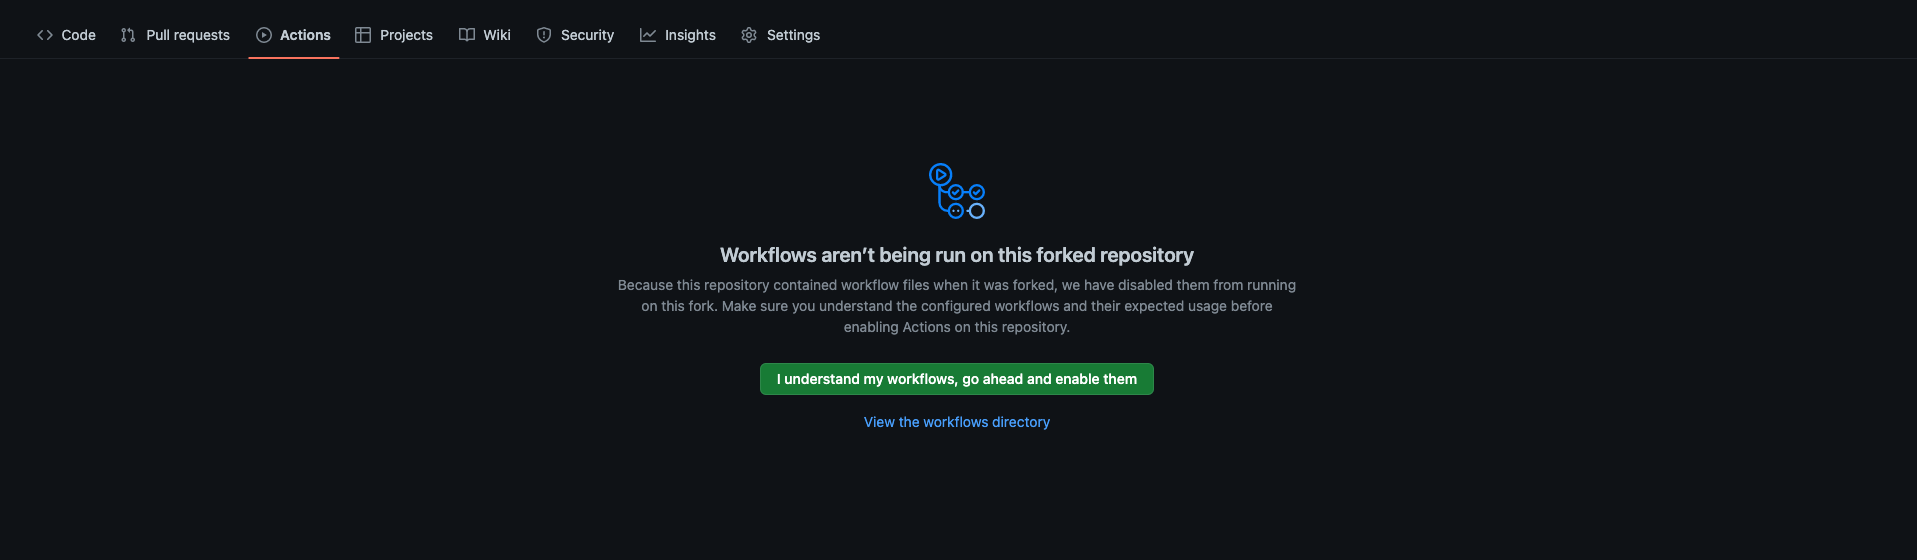
Click on “I understand my workflows, go ahead and enable them”
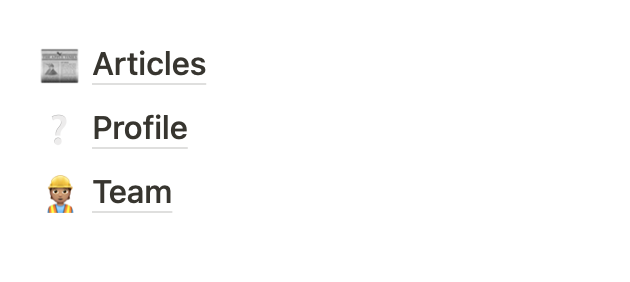
Go back to Notion and pick any page from the collections below the callout block. Set the page status to Draft and then back to what it was (Public, Published or Completed).
Wait 1-3 minutes and the URL inside the callout block should be pointing to a populated website. You can now start changing the content of your website. Note that it can take up to 3 minutes for your changes in Notion to reflect on the website.
Collections are just child Notion databases on the root page. Clicking on a collection opens it and shows its pages. Collections are below the callout block and are listed like this in a template:
Enjoy
If this is the first time you use a MotionLink website, we suggest you check out Managing content before changing the content of your website. Also note that you can add more properties to the pages in the collections, but you should not remove or change the types of the properties that were already there.
As always we would love to know what you think. Send us an email or check us out on Twitter.